
Panorama Stitching
A tutorial on stitching a panorama from RAW files in Adobe Photoshop

Stitching panoramas is a HUGE subject to get into, having different styles, focal lengths & lenses causing all sorts of different issues.. To start off with, I’ll try keep things simple with this ultra wide angle, 9 portrait shot panorama and go through my process of how I shot it, thoughts on composition and exposure and how to stitch it in Adobe Photoshop & Camera RAW.
Enjoy!
Composition
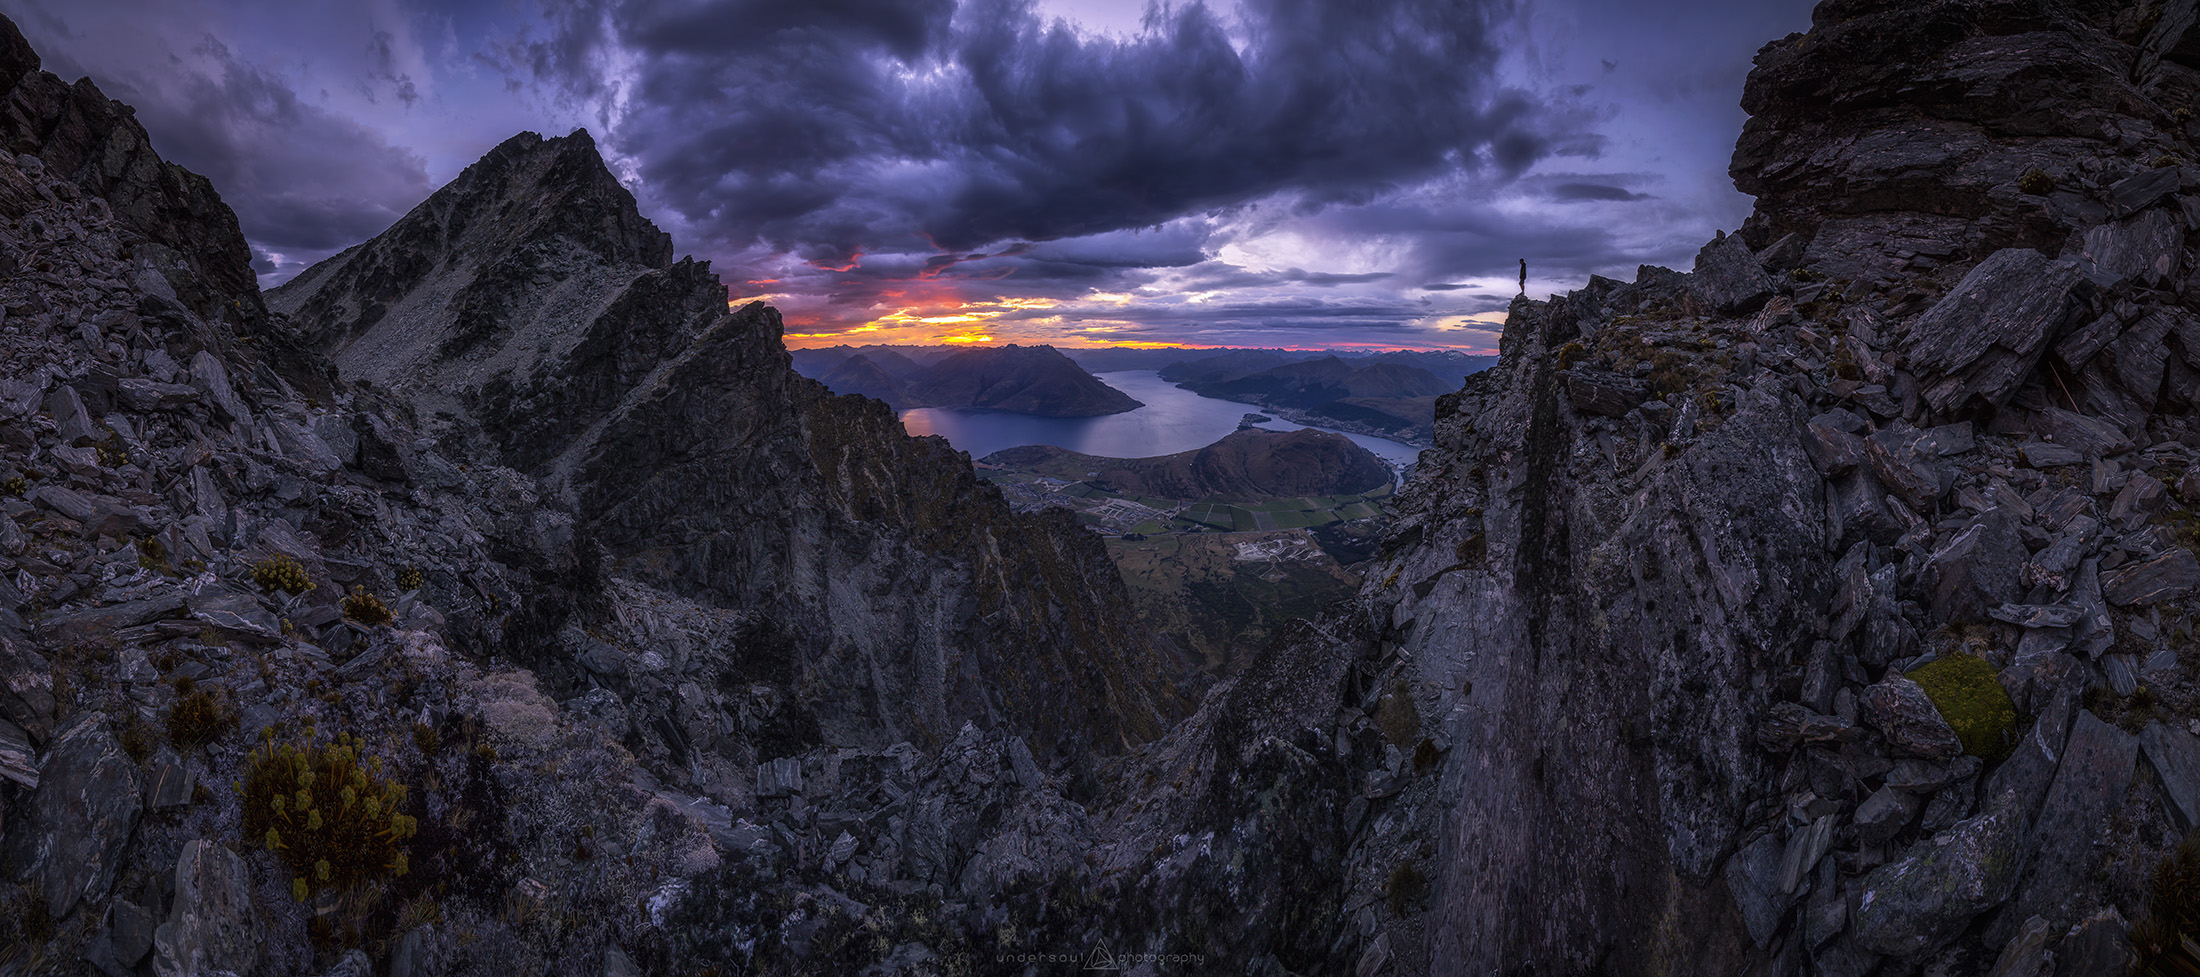
This panorama encompasses roughly a 280º field of view, so I nearly spun all the way around to capture everything. Being on a cliff with a rock wall behind me gave this cool bowl effect when capturing such a wide field of view, so I picked a spot looking right at Queenstown & Lake Wakatipu so it would be in the centre, then tried to balance the peak on the left with my friend Jeremy standing silhouetted against the sky on the right to balance things out.
I also set up close to the little bush on the bottom left to include some more foreground interest to contrast against the rocks. I usually shoot panoramas in portrait to gain a larger field of view & also get a larger resolution, having the final image 5472 pixels tall instead of the usual 3648. I look through the view finder and spin back & forth to try to visualise the composition of how it will look.
Finding a nice balance of sky to foreground, trying to leave a bit of space above the top of the peak on the left, I then positioned the bush in the bottom of the frame, again leaving a little bit of space under it so its not squished to the edge of the frame.
This all takes a bit of practice to get your head around how things will look once stitched, so just keep trying & shooting everything you think of until you get it! (It took me years & a lot of failed panoramas to figure it out)
Here are the RAW files to show how each shot looks on its own.

These are all taken on a Canon 6D with the Tamron 15-30 f/2.8 at 15mm in portrait orientation, so each individual shot is covering a large field of view already.
In the field
As you can see, these shots are pretty dark! I actually shot 3 exposures per frame, one dark, one medium & one bright (by using the exposure bracketing feature) to blend together (HDR) but found I could get all the dynamic range needed from the medium exposures. I always try to expose for the brightest part of the image, so for this pano, I exposed for the brightest part of the sky around the sun as to not over expose and lose those beautiful colours! Using the histogram helps to see if your clipping those highlights!
A crucial part to shooting panos is KEEPING YOUR CAMERA LEVEL while rotating the tripod. This means you need to set up your tripod perfectly level so where the legs meet the tripod head is perfectly flat, otherwise you are going to end up with wonky images that stitch into a wonky horizon! Don’t forget to use your cameras built in level, check your camera manual or good old google to find this ;)
Another very crucial part of this process is overlapping your images so photoshop has something to stick together. I aim to get around 50% overlap, so I start left to right, look at whatever is in the centre of my current frame (be it a mountain top or bush etc) and then move that point to the edge of the frame for the next shot. Shooting in live view mode really helps this.
Processing
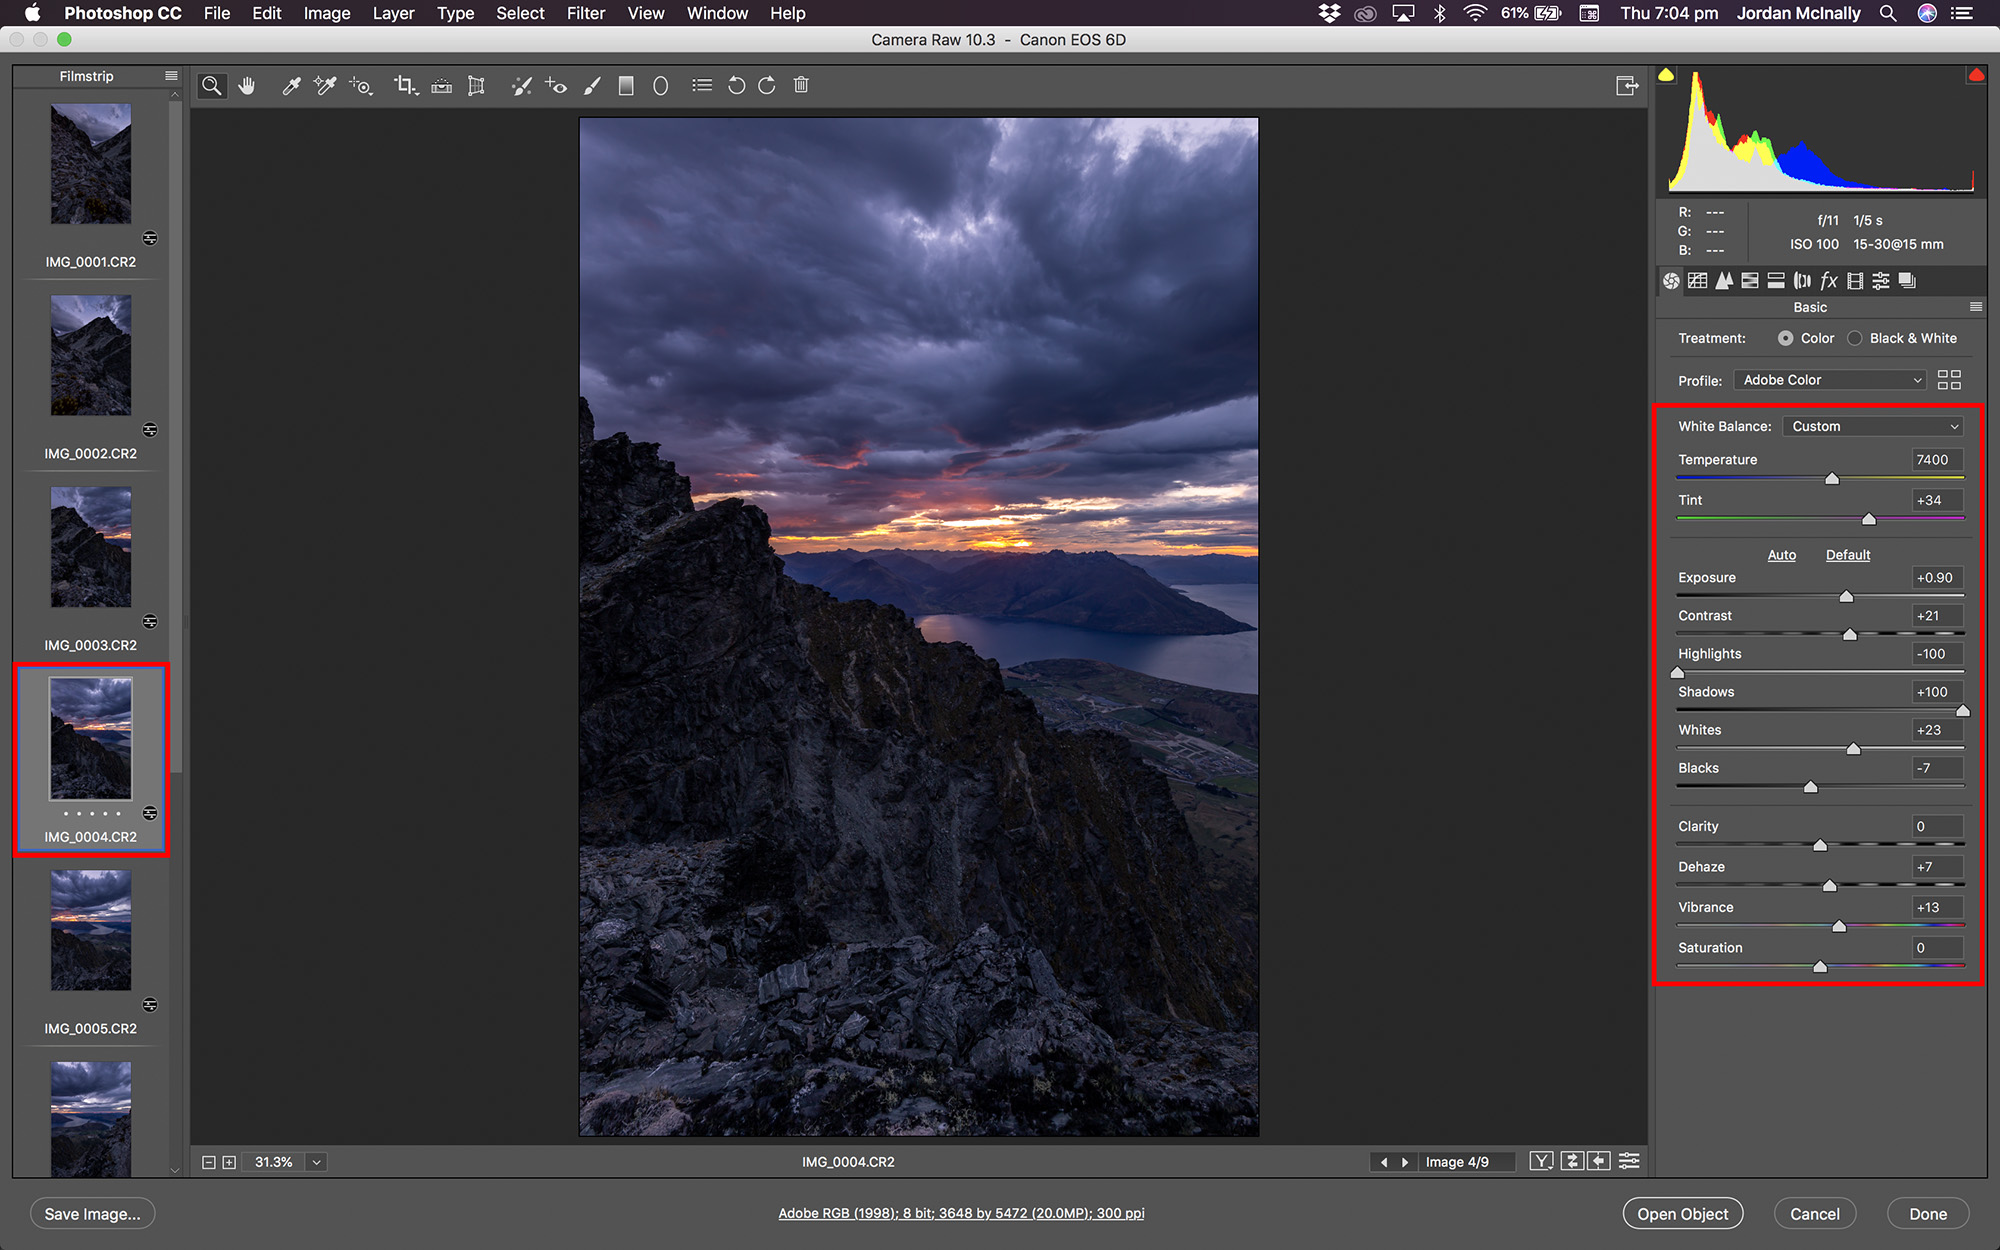
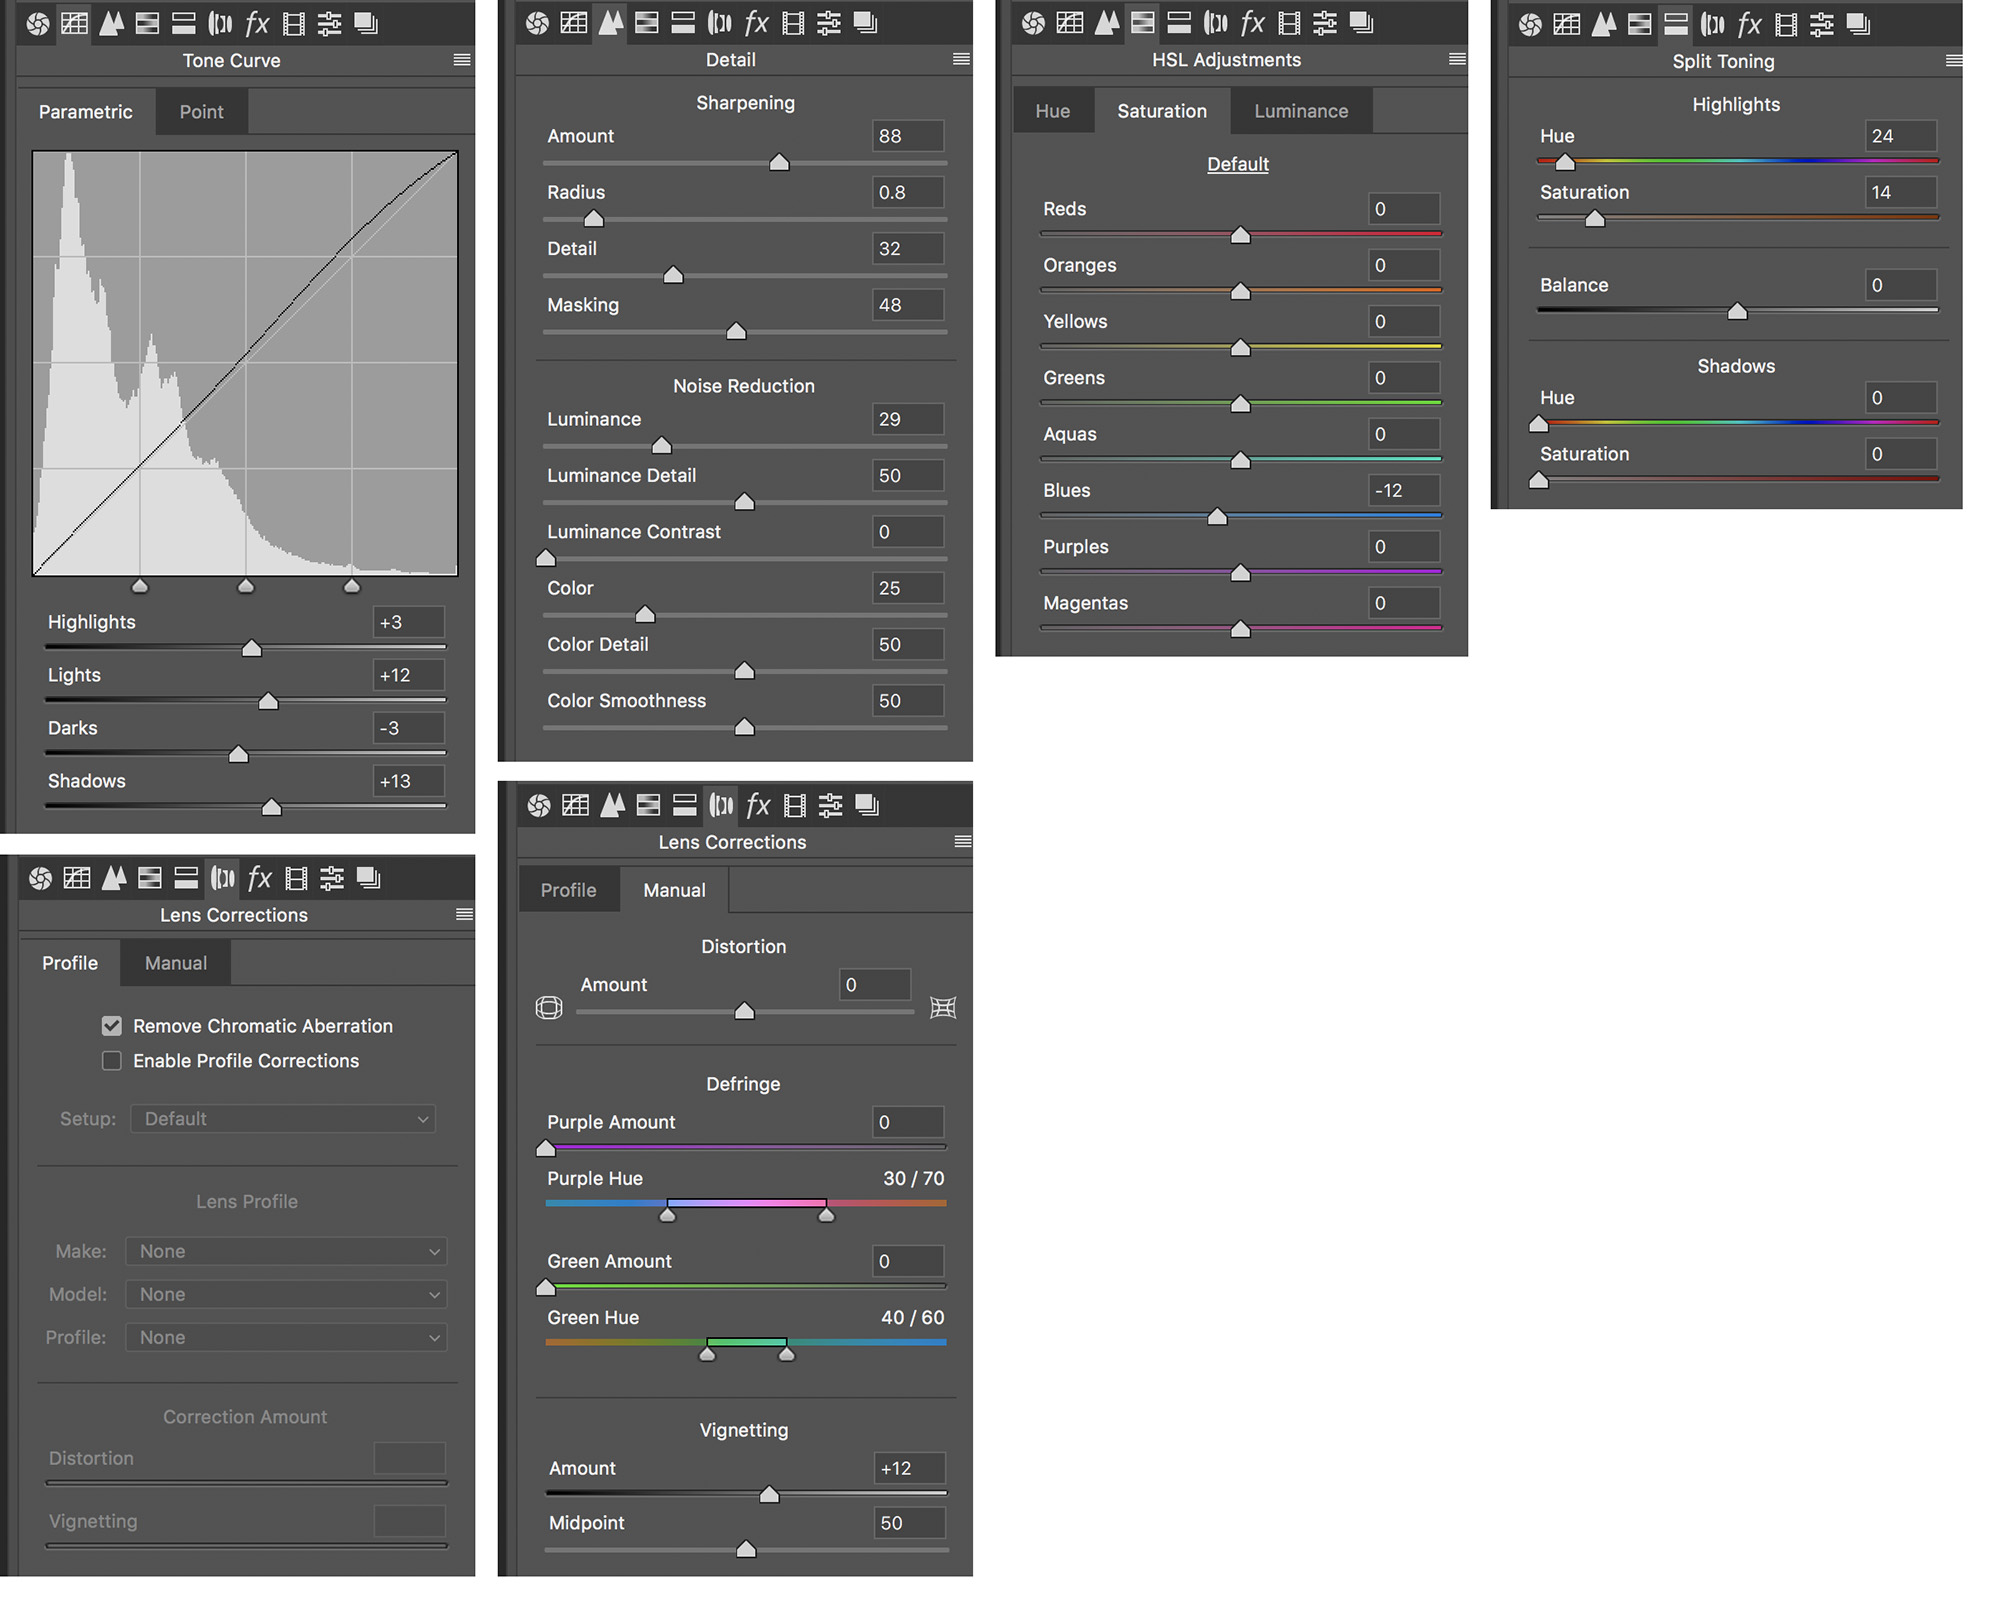
Lets get started. Open your RAWs in Camera RAW, then pick one that has the brightest light in it or which ever shot will be in the centre, I chose IMG_0004 as its nearly in the middle & has the brightest light in it. Process this image how you see fit, but make sure to correct any vignetting in the corners. Heres the slider settings I’ve used;

Once your happy with your settings, select all your images (Click back on your chosen master image & hit command A) and click the little button up the top left above your shots & hit ‘sync settings’
.
.
Sometimes you need to exposure match each shot, as you may notice that depending on how much light is in each shot (usually how much sky) will change how bright that exposure is, even though it has the exact same settings as the other shots.. But Camera RAW will use the settings of which ever image you are on and sync them across the other images, so technically you could skip the sync settings step.. However I’ve found that sometimes you run into issues of images not stitching properly, or at all, so best to sync them anyway!
Now, with all of your images selected and sitting on your brightest, middle or master shot (what ever you want to call it!) head back up to that options box in the top left corner of Camera RAW and hit ‘Merge To Panorama’.
You should get something that looks a little like this;

From here you have the option to chose Spherical or Cylindrical projection, try them both to see which works best for your panorama. Spherical usually works better for more zoomed in focal lengths (40mm or more) where Cylindrical tends to suit wide angle focal lengths that have a bit of distortion (14mm - 24mm)
Another option you will notice that I love dearly (when it works!!) is Boundary warp. It drags everything out around the edges to get rid of those white areas, but it can often warp any straight lines, like your horizon, so be careful! It worked pretty well for this shot;

If Boundary warp screws things up a bit, leave it at 0 or push it as far as you can before you lose your straight horizon, then you can use the content aware tool in Photoshop to fill the white gaps in, or crop them out. I’ll show how to do that at the end, but first you need to merge your pano! I’m sure you can find that button..
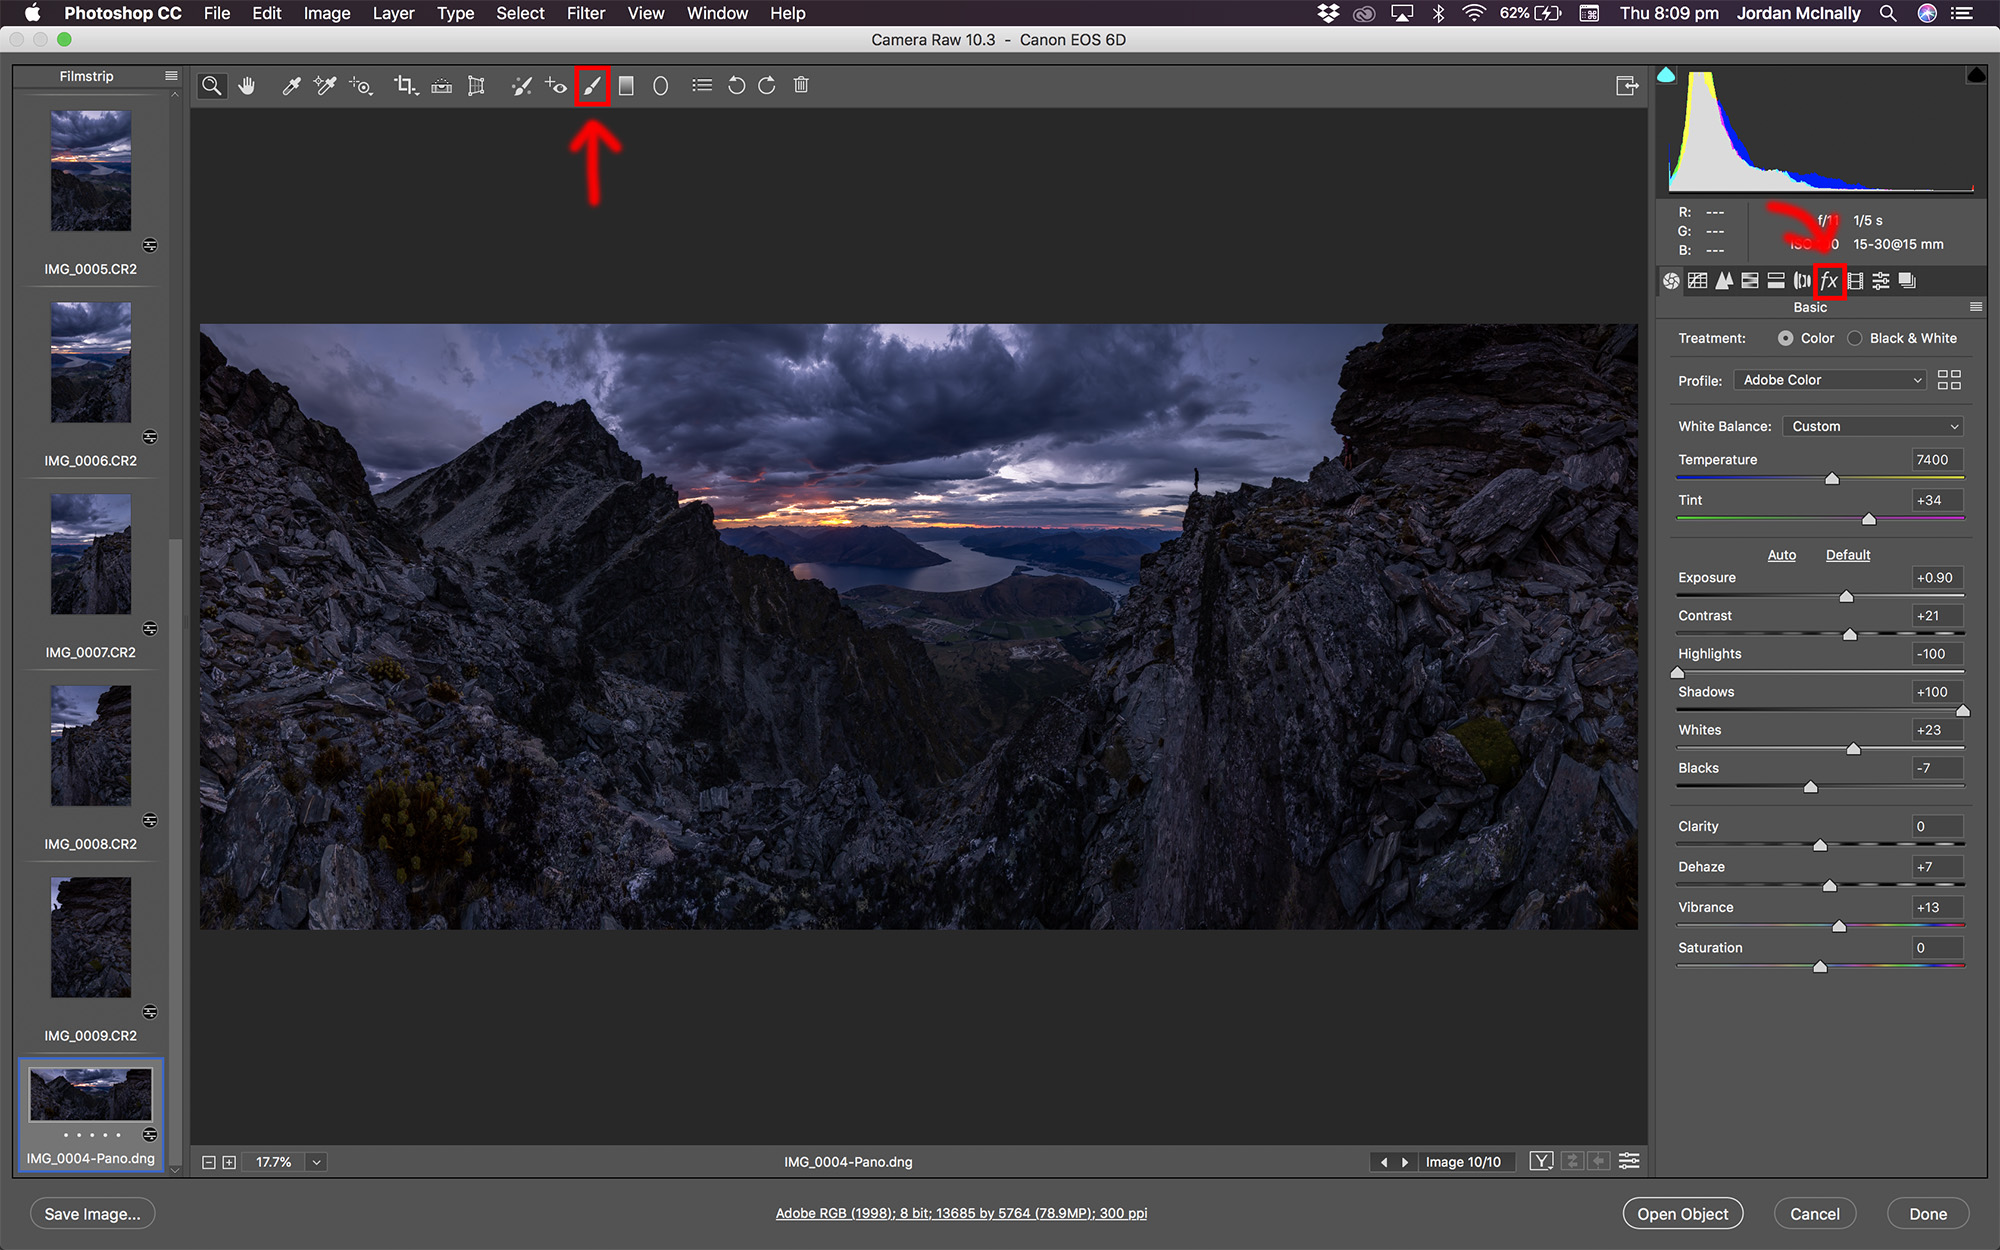
Once merged, you can add a few tweaks while still in Camera RAW, like running an adjustment brush over certain areas to brighten them up (maybe the dark rocky foreground & that bush on the left) or adding a vignette in the ‘fx’ tab, both options I have highlighted in the above screen shot. I personally like to do all these subtle adjustments in photoshop as seperate layers by using the camera RAW filter & using layer masks so I have full control of where that adjustment is visible.
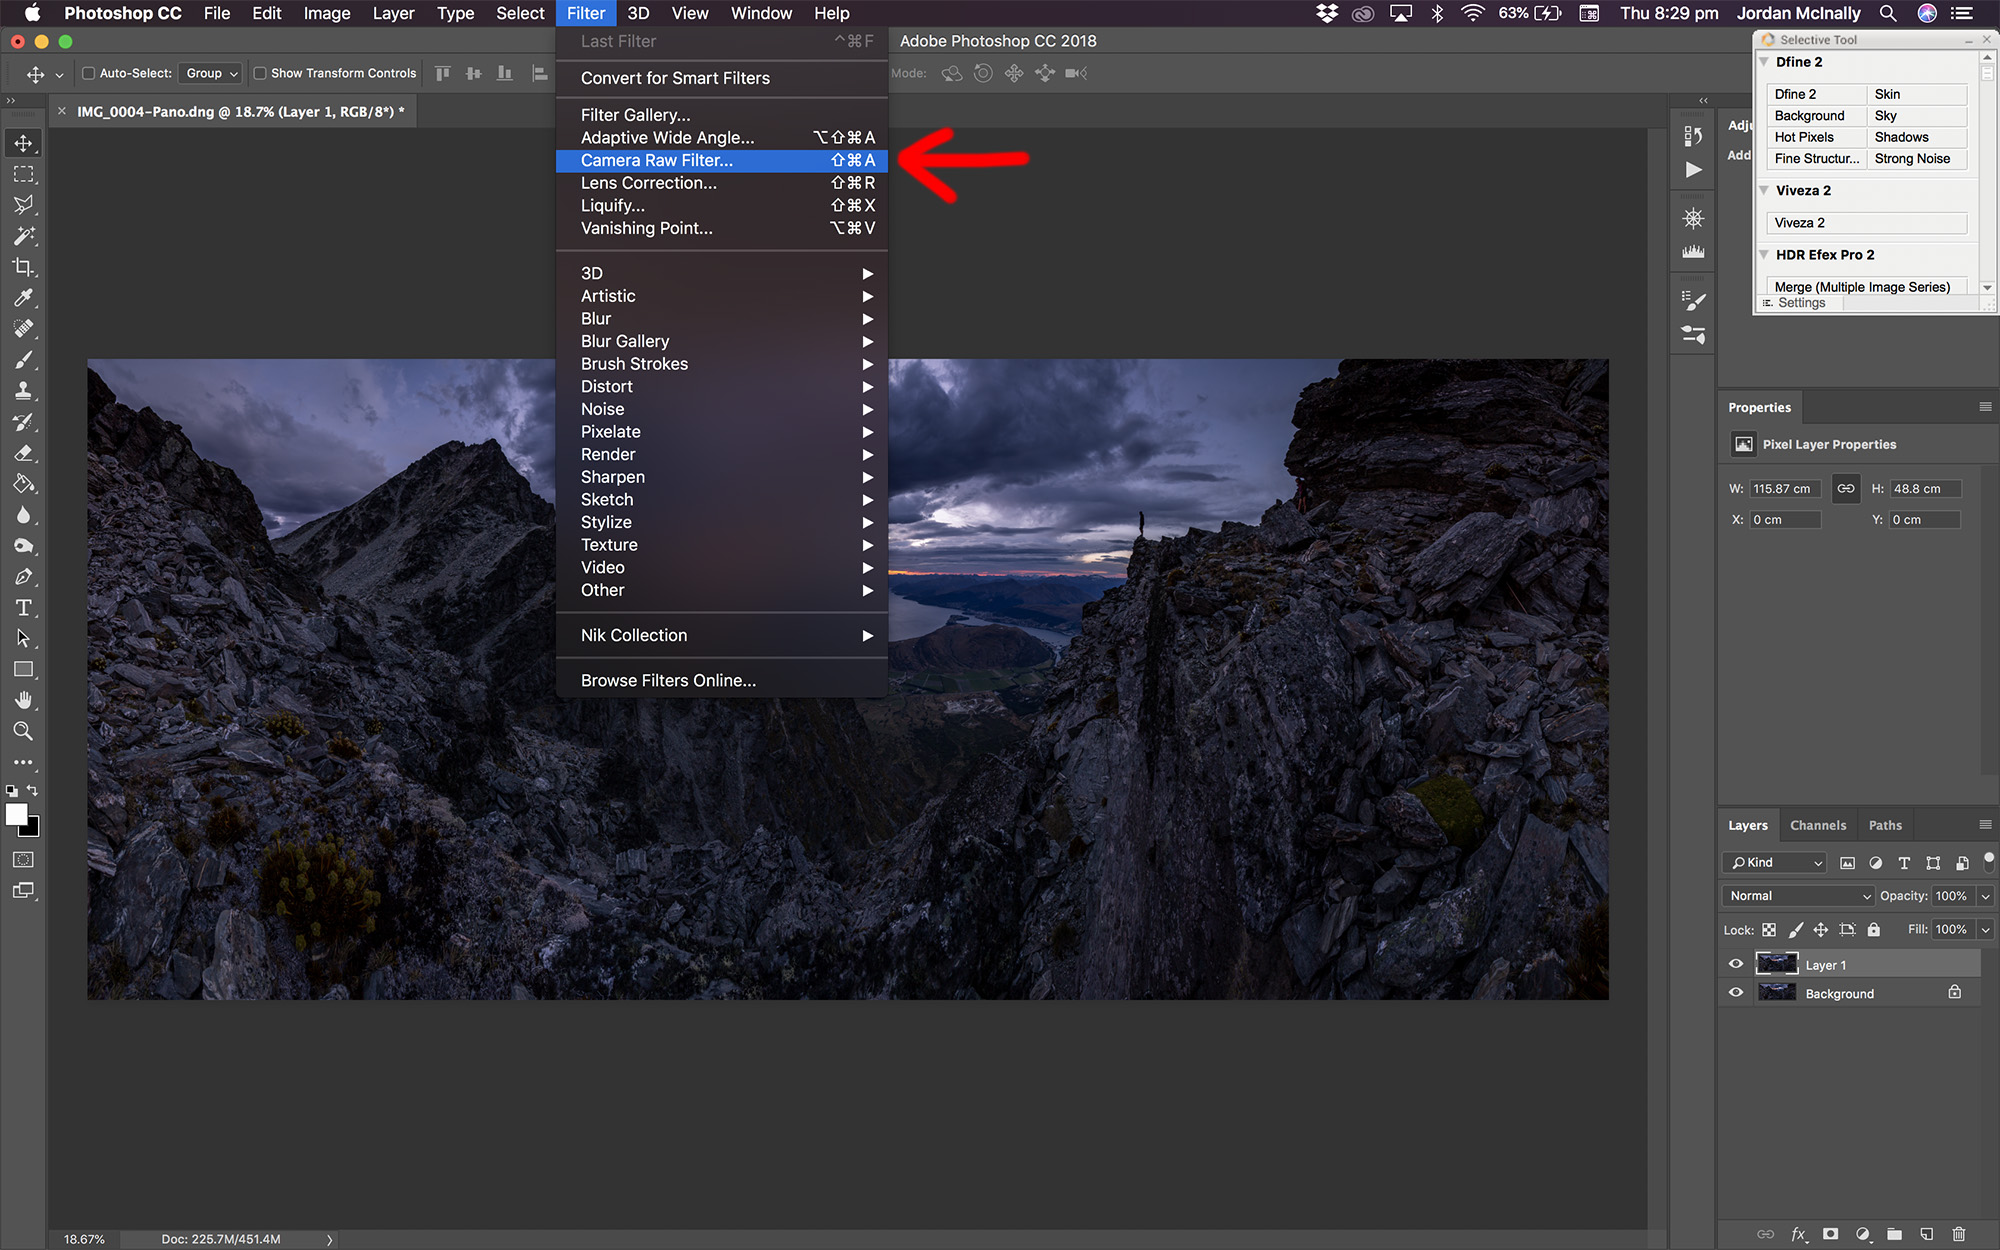
Hit ‘command J’ to duplicate the layer (or ‘Command, Option, Shift, E’ to create a new layer from everything visible if you have multiple layers & masks already) then go to Filter, Camera RAW filter;
To add a layer mask, click where the red arrow is pointing down the bottom, use black to paint the layer out/erase, white to paint it in where you want it (hold option & click this button to make your layer mask black so you can paint in that layer where you want)

From here I will make a bunch of colour adjustments, selective exposure adjustments, some panoramic distortion warping if needed and also add some Nik Color Efex Pro 4 filters to make things look awesome, but I’ll leave that for another tutorial as this ones pretty long already!!
Lastly, for those of you needing to fill some gaps where boundary warp failed you (I have to do this for over half my panoramas) once you’ve got your pano opened in photoshop, go to the Layer option & flatten image;
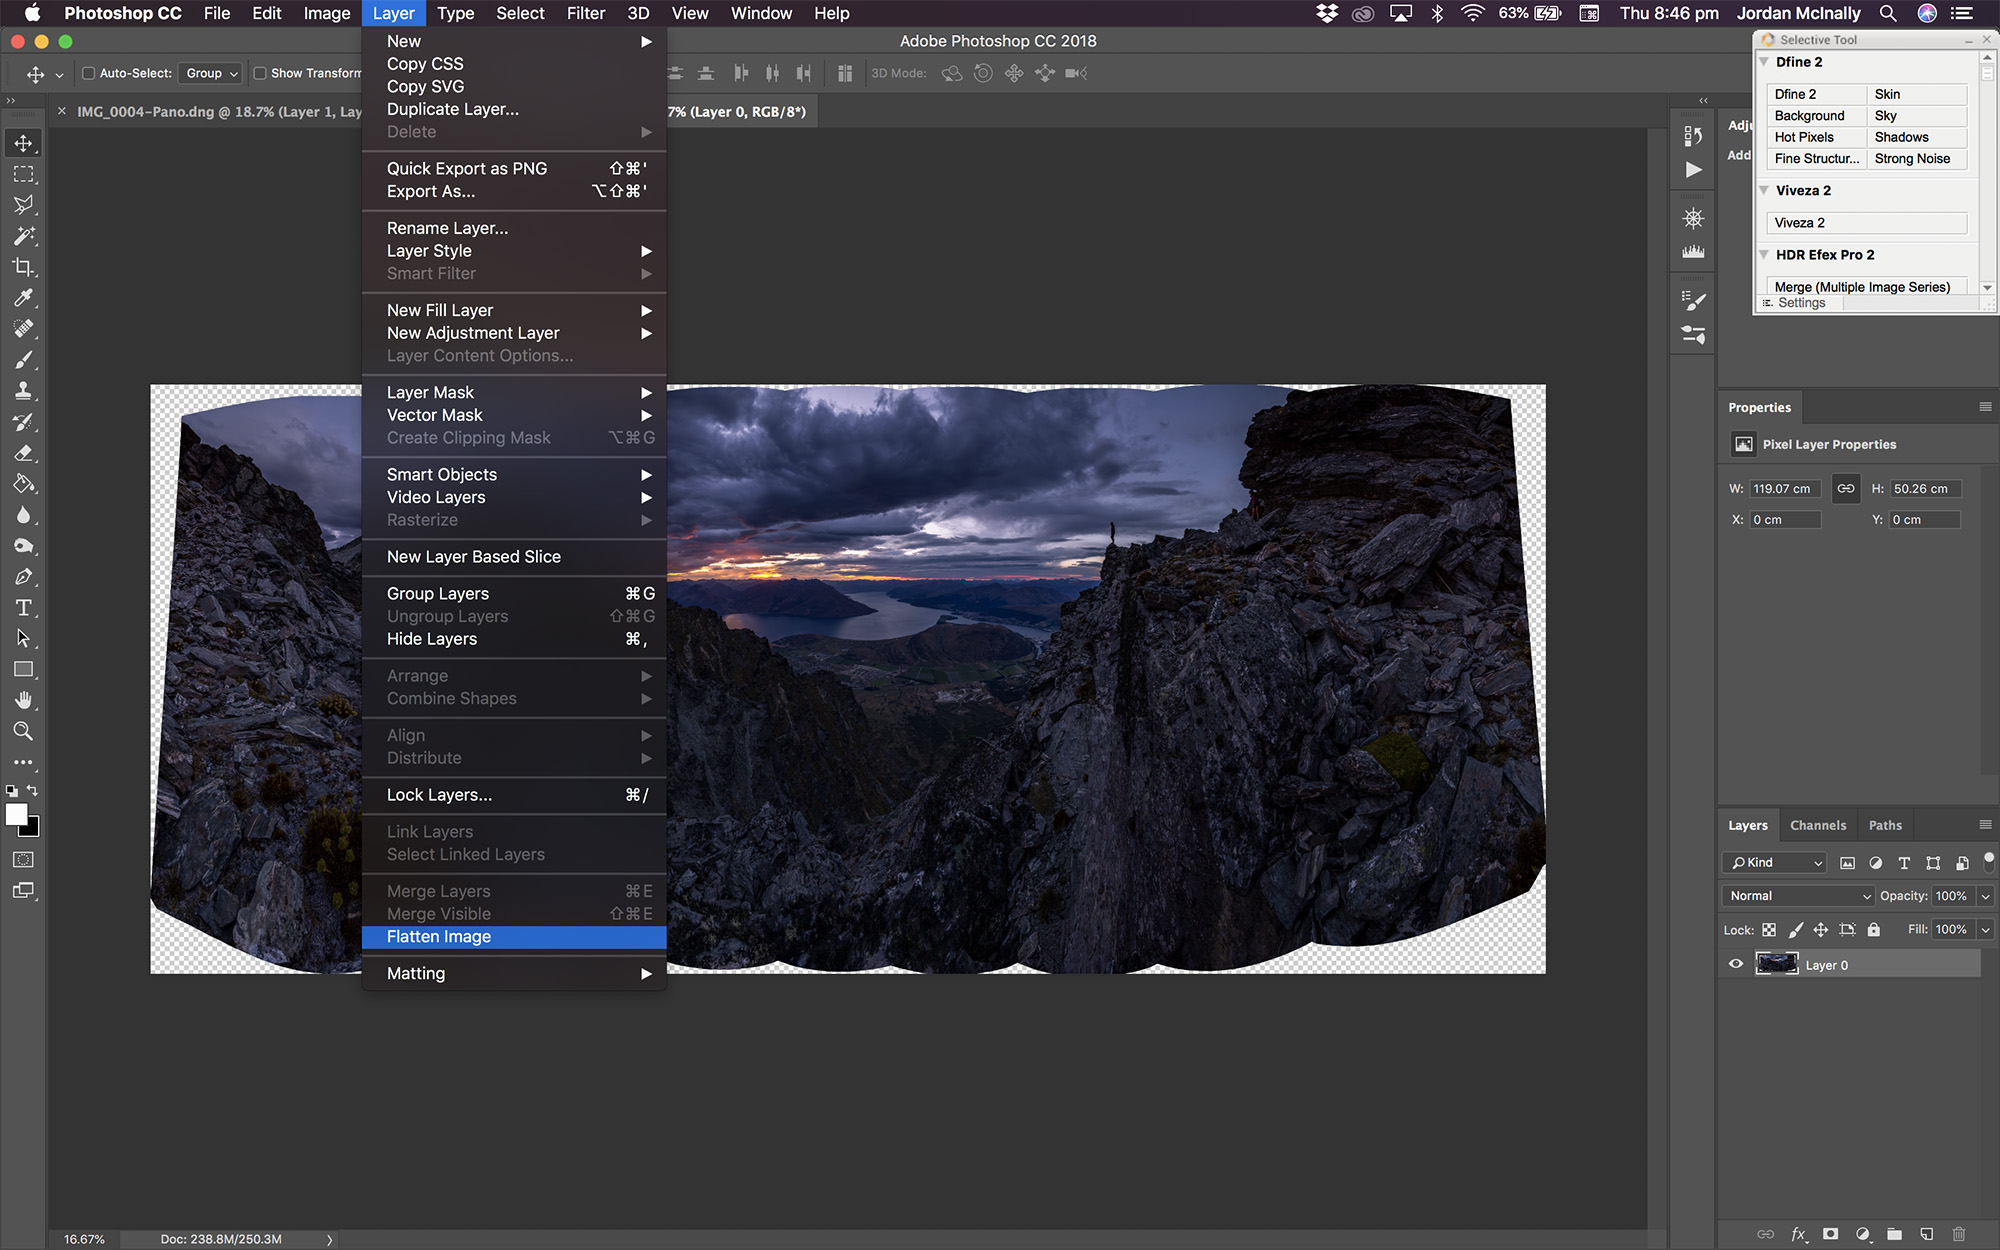
This just makes it easier to use Content Aware as you can simply hit the delete key, rather than having to go up to ‘Edit’ - ‘Fill’ every time..
Now hit ‘L’ or chose the Polygonal Lasso tool as you can click a bunch of spots to select odd shaped areas (& also you can scroll around mid selection or take a break if your zoomed in & selecting a huge area!)
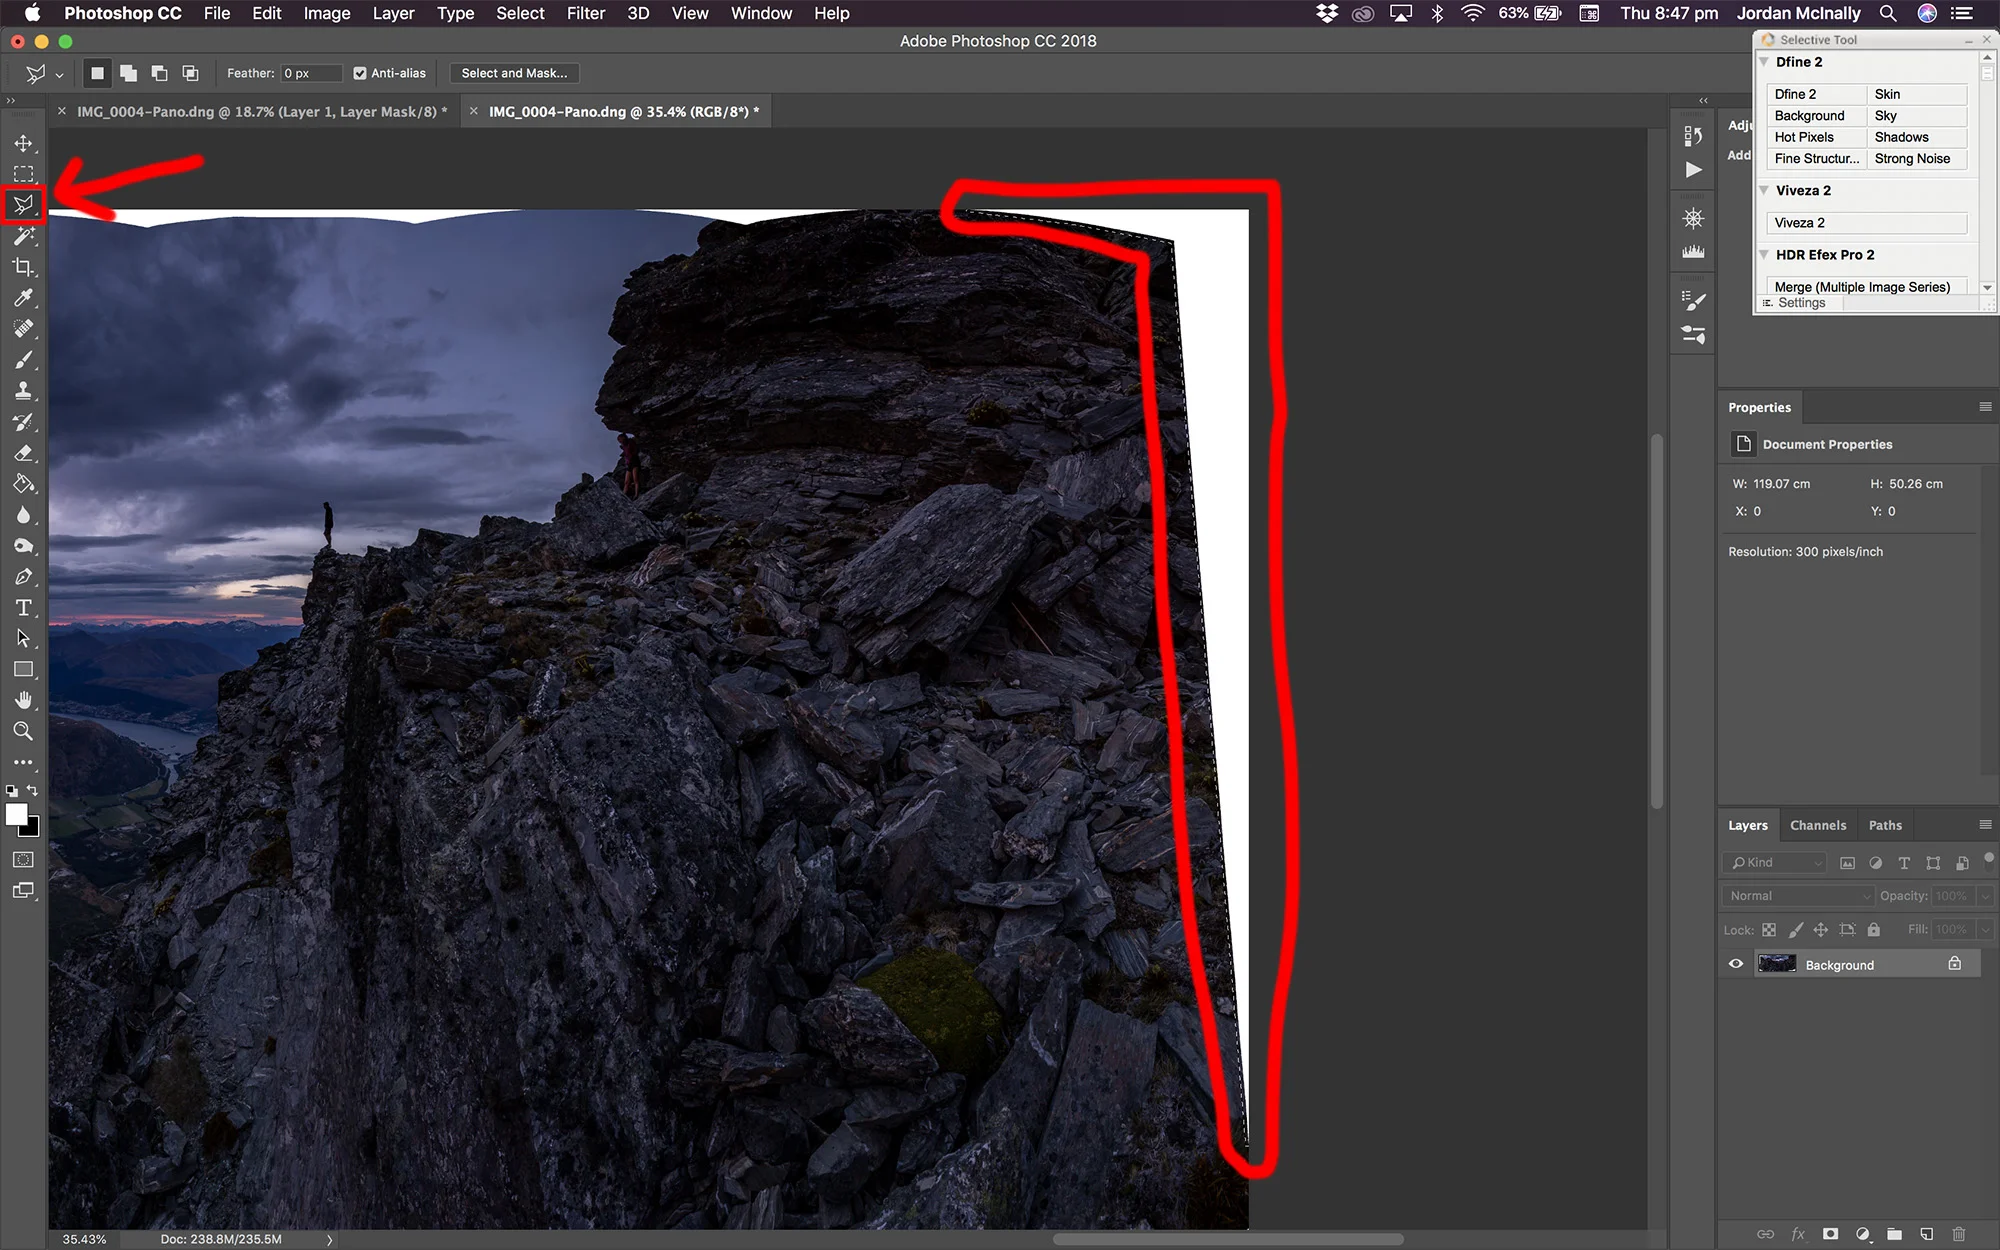

You can double click to finish off your selection, or click back where you started (you’ll notice the little dot come up) then easily just hit delete which brings up the Content Aware Fill option box, and you just hit enter..
It should fill your empty white area with similar content from around your selection like mine has below;
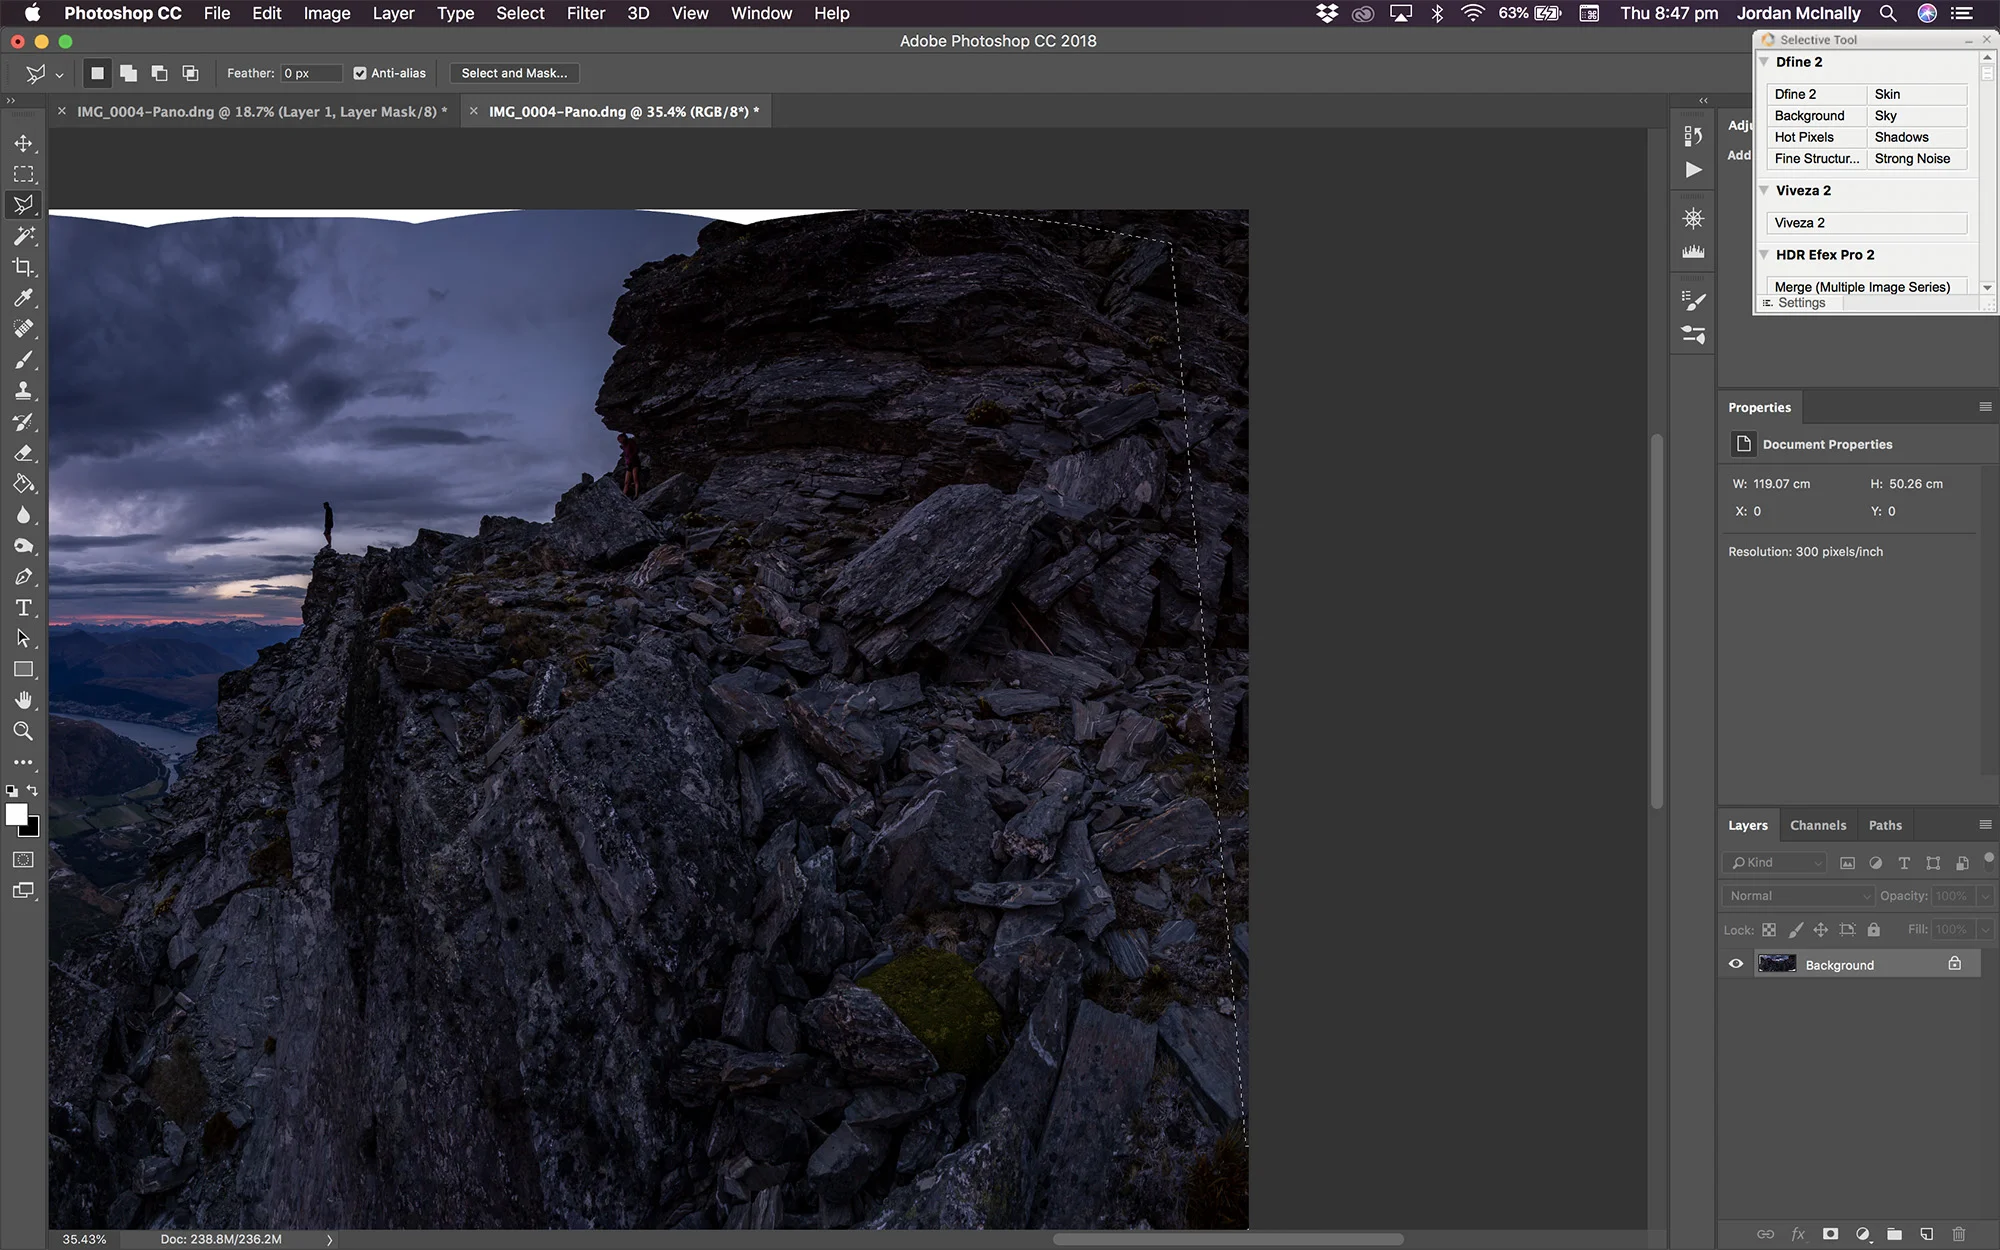
Repeat this all around the edges until you’ve filled out you image :)

This tool is amazing & works for getting rid of a lot of annoying stuff, like people you don’t want in your shot (you may have noticed the girl standing under the cliff there that I deleted for the final image..)
I hope this has helped you guys, I’ve had a lot of requests for a panorama tutorial so I’m sure there will be a few people out there happy!
Let me know if theres anything you would like me to add to this tutorial, or if you need any help with some stitching issues! Facebook and Instagram are the best way to get in touch, just search Undersoul Photography, or send me an email;
jordan.undersoul@gmail.com
Enjoy!! :)
If this tutorial helped you, please feel free to make a donation as I am a struggling artist, I want to help people and share my knowledge with everyone, but I also need to eat!
$5 gets me a coffee to fuel me for a sunrise shoot.
$10 is petrol to get me to that shoot.
$20 is my food for that shoot.
Every dollar helps, so please help keep me alive and bringing you more content!
ASB Bank
MR J R MCINALLY
12-3234-0090882-50
For international donations, my Paypal email is;
_24_@hotmail.co.nz
Thank you! Much love..
Jordan